Introduction
Table of Contents
Creating a home obstacle course isn’t just a fun pastime; it’s a fantastic way to keep kids and adults alike active and engaged. Whether you’re looking to spice up your fitness routine or create a thrilling playground for your little ones, building an obstacle course at home can be both rewarding and exciting.
In this comprehensive guide, we’ll walk you through the steps of designing and constructing your very own obstacle course at home. From basic planning to advanced setups, we’ve got you covered. Let’s dive in and bring out your inner architect!

Why Build an Obstacle Course at Home?
Fun and Fitness Combined
One of the standout benefits of building an obstacle course at home is the combination of fun and fitness. It’s a unique way to engage your body while having a blast. Jumping over barriers, climbing walls, and balancing on beams all contribute to a full-body workout that improves strength, agility, and coordination.
Family Bonding Time
Creating and participating in an obstacle course at home can be a fantastic bonding activity for families. It encourages teamwork, communication, and problem-solving. Plus, it’s a great way to get everyone off their screens and moving around in the fresh air.
Customization and Creativity
When you design your own obstacle course at home, the sky’s the limit. You can tailor it to suit the ages and abilities of the participants, adding more challenging elements as skills improve. This customization ensures that everyone gets the most out of the experience.
Planning Your Obstacle Course at Home
Assess Your Space
The first step in building an obstacle course at home is to evaluate the space you have available. Whether you have a small backyard or a large field, understanding your area will help you design an appropriate course.
- Measure the Area: Use a tape measure to get the exact dimensions of your space.
- Identify Terrain: Take note of any slopes, trees, or other natural features that could be incorporated into your course.
- Safety First: Ensure the area is safe and free from hazards like sharp objects or uneven ground.
Set Your Objectives
Before you start building, it’s essential to decide what you want to achieve with your obstacle course at home. Are you focusing on fitness, fun, or a mix of both? Your objectives will guide the design and complexity of the course.
- Fitness Goals: Include elements that improve strength, endurance, and agility.
- Fun Elements: Add whimsical obstacles like tunnels and slides for younger participants.
- Skill Level: Tailor the difficulty of the course to match the abilities of the users.
Design Your Course Layout
With your space assessed and objectives set, it’s time to design your course layout. Sketch out a rough plan on paper, considering the flow and sequence of obstacles.
- Start and Finish Points: Clearly mark the beginning and end of your course.
- Obstacle Placement: Space out obstacles to allow for recovery time between challenges.
- Natural Features: Incorporate trees, hills, and other natural elements to add variety.
Basic Obstacles to Get Started
Jumping Hurdles
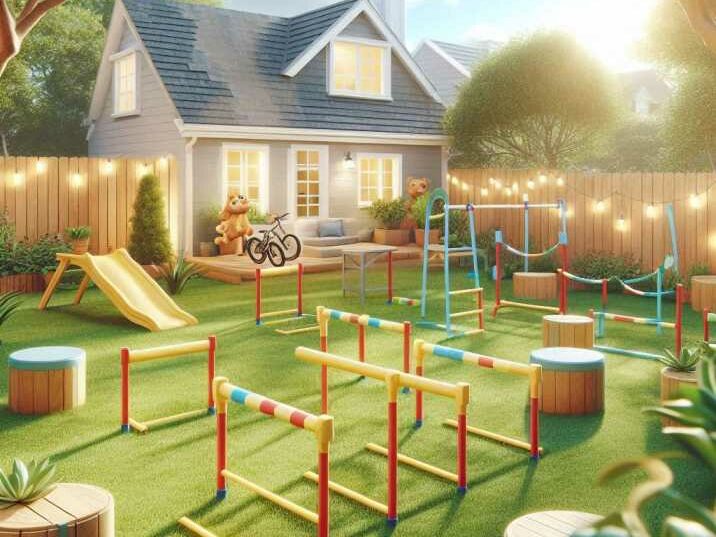
Jumping hurdles are a great way to enhance leg strength and coordination. You can build simple hurdles using PVC pipes or wooden dowels.
- Materials Needed: PVC pipes or wooden dowels, connectors or brackets, measuring tape.
- Construction Tips: Ensure the hurdles are stable and secure to prevent accidents.
- Placement: Space hurdles evenly to allow for a smooth jumping sequence.
Balance Beams
Balance beams help improve core strength and balance. You can use wooden planks or even sturdy logs for this obstacle.
- Materials Needed: Wooden planks or logs, saw, sandpaper.
- Construction Tips: Sand down any rough edges to prevent splinters. Secure beams firmly to the ground.
- Placement: Place beams at varying heights to increase difficulty.
Tunnels
Crawling through tunnels adds a playful element to your course. You can use large cardboard boxes or flexible drainage pipes.
- Materials Needed: Cardboard boxes or drainage pipes, tape, scissors.
- Construction Tips: Ensure tunnels are wide enough for easy crawling. Secure them to prevent collapsing.
- Placement: Position tunnels in shaded areas to keep them cool.

Advanced Obstacle Ideas
Climbing Walls
Climbing walls challenge upper body strength and coordination. You can build a simple wall using plywood and climbing holds.
- Materials Needed: Plywood sheets, climbing holds, screws, drill.
- Construction Tips: Anchor the wall securely to a sturdy frame or structure. Arrange holds at various heights and angles.
- Placement: Place the wall in an area with soft ground or padding underneath.
Rope Swings
Rope swings are not only fun but also great for building upper body strength. You can use thick ropes and secure them to a tree branch or a sturdy overhead beam.
- Materials Needed: Thick ropes, knots, carabiners, tree branch or beam.
- Construction Tips: Ensure ropes are securely fastened. Test the swing’s stability before use.
- Placement: Hang the swing over a soft landing area like grass or sand.
Tire Runs
Tire runs are excellent for agility training. You can arrange old tires in a straight line or a zigzag pattern.
- Materials Needed: Old tires, shovel, measuring tape.
- Construction Tips: Partially bury tires to keep them stable. Space them evenly to allow for quick footwork.
- Placement: Create a clear path leading to and from the tire run.
Safety Considerations
Supervision and Spotting
Safety should always be a top priority when building and using an obstacle course at home. Ensure that participants are supervised, especially children.
- Adult Supervision: Always have an adult present to monitor activities.
- Spotting: Provide assistance when attempting more challenging obstacles.
Use of Protective Gear
Encourage the use of protective gear such as helmets, knee pads, and elbow pads to minimize the risk of injury.
- Helmets: Protect the head during falls or slips.
- Pads: Cushion knees and elbows from impacts.
- Proper Footwear: Wear sturdy shoes with good grip.
Regular Maintenance
Keep your obstacle course at home in top condition by regularly checking for wear and tear.
- Inspection: Regularly inspect obstacles for stability and safety.
- Repairs: Promptly repair or replace damaged elements.
- Cleaning: Keep the area clean and free from debris.
Incorporating Themes and Challenges
Themed Obstacle Courses
Adding a theme to your obstacle course at home can make it even more engaging and fun. Consider themes like pirates, jungle adventure, or superhero training.
- Pirate Theme: Use ropes and planks to create a ship-like structure.
- Jungle Adventure: Incorporate natural elements like vines and leaves.
- Superhero Training: Design obstacles that mimic superhero challenges.
Timed Challenges
Introduce timed challenges to add a competitive element. Use a stopwatch to time participants as they complete the course.
- Record Times: Keep track of the best times for each participant.
- Personal Bests: Encourage participants to beat their own records.
- Awards: Offer small prizes for the fastest times.
Team Challenges
Team challenges promote cooperation and teamwork. Design obstacles that require collaboration to succeed.
- Relay Races: Divide participants into teams and set up relay-style challenges.
- Group Tasks: Create obstacles that require multiple people to complete.
- Team Building: Use the course as a team-building exercise for groups.
Engaging the Community
Hosting Events
Once your obstacle course is ready, consider hosting events to engage your community. Invite friends, family, and neighbors to participate in obstacle course races or fun runs.
- Open Invitations: Spread the word through social media and local community boards.
- Event Planning: Plan the event with activities, refreshments, and prizes.
- Safety Briefing: Conduct a safety briefing before the event begins.
Social Media Sharing
Share your obstacle course adventures on social media to inspire others and build a sense of community.
- Photos and Videos: Capture moments and share them online.
- Hashtags: Use relevant hashtags to reach a wider audience.
- Stories: Share behind-the-scenes stories of building and using the course.
Fundraising Opportunities
Use your obstacle course to raise funds for a cause. Organize charity events where participants can donate to participate.
- Charity Runs: Host a charity obstacle course run.
- Fundraising Goals: Set clear fundraising goals and promote the cause.
- Community Support: Encourage local businesses to support the event.
Table of Information:
| Section | Details |
|---|---|
| Introduction | Fun and fitness through home obstacle courses. |
| Why Build? | Fun & Fitness: Combines enjoyment with exercise. Family Bonding: Encourages teamwork. Customization: Tailor to various ages and abilities. |
| Planning | Assess Space: Measure area, identify terrain, ensure safety. Set Objectives: Define fitness and fun goals. Design Layout: Plan start/finish points and obstacle placement. |
| Basic Obstacles | Jumping Hurdles: Use PVC pipes or wooden dowels. Balance Beams: Use wooden planks or logs. Tunnels: Use cardboard boxes or drainage pipes. |
| Advanced Obstacles | Climbing Walls: Use plywood and climbing holds. Rope Swings: Use thick ropes, secure attachments. Tire Runs: Arrange old tires in patterns. |
| Safety | Supervision, protective gear (helmets, pads), regular inspections. |
| Themes & Challenges | Themes: Pirate, jungle, superhero. Timed Challenges: Use stopwatches, record times. Team Challenges: Relay races, group tasks. |
| Community Engagement | Host Events: Plan activities, safety briefings. Social Media: Share photos, videos, hashtags. Fundraising: Organize charity runs. |
| Conclusion | Build for fun and fitness, share creations. |
| FAQs |
Conclusion
Building an obstacle course at home is a rewarding project that provides endless fun and fitness opportunities for all ages. By following the steps outlined in this guide, you can create a safe, engaging, and challenging course that will keep everyone entertained and active.
Ready to get started? Gather your materials, plan your layout, and start building your dream obstacle course today. And don’t forget to share your creations with us—we’d love to see how you transform your backyard into an adventure playground!
FAQs
What materials do I need to build an obstacle course at home?
You will need materials such as PVC pipes, wooden planks, logs, cardboard boxes, drainage pipes, thick ropes, climbing holds, and old tires. These materials can be used to create various obstacles like jumping hurdles, balance beams, tunnels, climbing walls, rope swings, and tire runs.
How can I ensure the safety of participants on the obstacle course?
Ensure safety by providing adult supervision, using protective gear like helmets and pads, and regularly inspecting and maintaining the course. It’s also important to use sturdy materials and secure all obstacles properly.
How can I make the obstacle course more engaging for different age groups?
Tailor the difficulty and design of the course to match the abilities and interests of different age groups. For younger children, include fun elements like tunnels and slides. For older participants, incorporate more challenging obstacles like climbing walls and rope swings.
Can I use natural elements in my obstacle course?
Yes, incorporating natural elements like trees, hills, and rocks can add variety and challenge to your course. Make sure these elements are safe and stable before including them in your design.
How can I share my obstacle course experience with others?
Share your obstacle course experience by hosting community events, sharing photos and videos on social media, and using relevant hashtags to reach a wider audience. You can also consider organizing charity events to raise funds for a cause.


